Table of Contents
Bathroom Waterproofing Inspection Hyderabad | Thermal Seepage Audit
In the expanding urban residential landscape of Hyderabad—from legacy independent houses in Secunderabad, Begumpet, West Marredpally, Himayatnagar, and Abids, to premier high-rise apartments and sprawling villas in Jubilee Hills, Banjara Hills, Gachibowli, Hitec City, Kondapur, Financial District, Tellapur, Kokapet, and Nanakramguda—subfloor water seepage is a major cause of structural damage and inter-neighbor disputes.
A bathroom is an intensive wet zone, subject to high daily water volumes, high-pressure hydro-pneumatic plumbing supply lines, and harsh chemicals. When subfloor waterproofing membranes age, crack, or suffer from poor craftsmanship during initial construction, water seeps undetected into structural concrete sunken slabs.
By the time damp patches, bubbling paint, or active drips appear on lower-floor ceilings or adjacent bedroom walls, extensive hidden damage has already occurred. Rusted steel rebar, decayed concrete, mold growth, and efflorescence salt crusts deteriorate the building’s structural integrity.
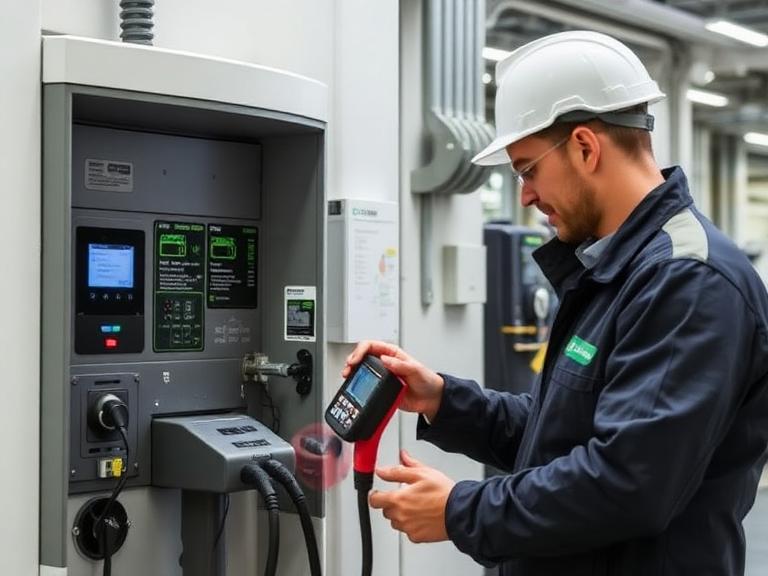
Conducting a professional Bathroom Waterproofing Inspection Hyderabad using non-destructive diagnostic tools identifies the exact source of leakage without breaking floor tiles.
This master guide covers advanced leak-detection technologies, common failure modes in Hyderabad residences, diagnostic inspection workflows, technical standards for 7-layer elastomeric waterproofing remediation, and itemized cost specifications for professional inspection services.
Why Non-Destructive Inspection Beats Guesswork Demolition
Historically, locating a bathroom leak involved destructive trial-and-error demolition: breaking wall tiles, tearing up floor screeds, and excavating sunken slabs hoping to find a damaged pipe or cracked membrane. This approach leads to unnecessary repair costs, extended downtime, and uncoordinated trade work.
Modern waterproofing diagnostics utilizes non-destructive testing (NDT) to map moisture beneath surface tiles. The operational comparison below highlights why advanced inspections are essential:
| Diagnostic & Remedial Parameter | Traditional Guesswork Demolition | Non-Destructive Waterproofing Inspection |
| Diagnostic Accuracy | Low; based on visual surface assumptions and breaking tiles | High (99%+); pinpoints exact thermal signatures and pipe pressure drops |
| Structural Impact | High; destructive breaking of sound tiles, screed, and wall brickwork | Zero; 100% non-invasive scanning using infrared, acoustic, and RF sensors |
| Inspection Time | Days of disruptive civil hammering | 60 to 90 minutes per bathroom on-site |
| Documentation Quality | Zero visual data; verbal opinions from daily masons | Formal technical report with FLIR thermal scans, moisture maps, and pressure data |
| Cost Efficiency | High initial cost; risks breaking undamaged plumbing lines | Saves up to 70% in repair costs by identifying precise leak locations |
| Conflict Resolution | Causes heated disputes between upper and lower apartment neighbors | Provides objective, verifiable evidence for RWAs and property owners |
The Non-Destructive Waterproofing Inspection Toolkit
Professional inspection engineers deploy advanced diagnostic instruments to evaluate hidden subfloor conditions:
1. FLIR Infrared Thermal Imaging Cameras
Thermal cameras detect minute temperature variations across wall and floor tile surfaces. Because water has a higher thermal mass than dry concrete and cools surface tiles through evaporation, subfloor water pools show up as distinct blue and purple cold spots on the thermal display screen.
2. Radio-Frequency (RF) Pinless Moisture Meters
Pinless moisture meters emit high-frequency signals that penetrate up to 40mm beneath ceramic, vitrified, or stone tiles without scratching surfaces. By recording quantitative moisture percentage levels across a grid layout, engineers generate a 2D moisture contour map of the subfloor.
3. Ultrasonic Acoustic Pipe Leak Locators
High-pressure plumbing leaks generate subtle acoustic vibrations inside walls. Acoustic detectors amplify these sound frequencies, allowing engineers to pinpoint concealed CPVC/PEX pipe pinholes through solid brickwork and tile layers.
4. Hydrostatic Pipe Pressure Test Gauges
To differentiate between plumbing supply leaks and waterproofing membrane failures, technicians isolate hot and cold water supply loops using pressure manifolds. Calibrated digital gauges monitor line pressure at 5 Bar over 60 minutes; a drop in pressure confirms an active supply pipe crack.
5. Micro-Video Inspection Endoscopes
Flexible digital endoscopes featuring LED illumination are inserted into narrow wall cavities, flush plate access panels, and drain traps to inspect hidden structural voids, concealed cistern frames, and internal pipe walls.
Common Causes of Bathroom Waterproofing Failure in Hyderabad
Waterproofing failures in Hyderabad residences stem from specific structural, material, and environmental factors:
1. Subfloor Sunken Slab Membrane Deterioration
Older properties across Secunderabad and Begumpet used single-coat cement slurry wash or coal tar paper inside sunken concrete slabs. Over 8 to 12 years, structural thermal expansion causes these rigid coatings to crack, allowing standing water to pool inside the concrete slab.
2. Borewell Water Mineral Scaling (High TDS)
Groundwater across Financial District, Tellapur, and Miyapur contains high concentrations of Total Dissolved Solids (TDS). Hard water minerals form salt crystals inside porous cement tile grout joints. As these crystals expand and contract, they break grout lines, opening direct paths for bath water to enter the subfloor.
3. Hydro-Pneumatic Booster Pump Pressure Surges
Modern high-rise towers in Kokapet and Gachibowli rely on automated booster pumps that create high water pressure. Over time, pressure surges (water hammer) stress CPVC joints, resulting in concealed pinhole leaks inside wall channels.
4. Improper Screed Slope Modeling
If civil masons fail to lay subfloor screed at a strict 1:100 fall gradient toward point or trench drains, shower water pools on floor tiles. Standing water penetrates tile seams and works its way through subfloor mortar beds.
Step-by-Step Stepwise Inspection & Diagnostic Workflow
Executing a non-destructive bathroom waterproofing inspection follows a systematic diagnostic schedule:
Phase 1: Visual Inspection & Moisture Scanning
Engineers conduct a visual assessment of tile grout condition, silicone seals, wall-floor joints, and lower-floor ceiling damage. FLIR infrared thermal cameras scan the space to identify cold moisture signatures.
Phase 2: Quantitative Moisture Mapping
Pinless moisture meters record subfloor saturation levels across a grid pattern. Engineers record moisture percentages to map the spread of subfloor water.
Phase 3: Hydrostatic Supply Line Pressure Testing
Technicians isolate hot and cold water lines using pressure manifolds and pump them to 5 Bar pressure for 60 minutes. Digital gauges track line stability to verify or rule out supply pipe leaks.
Phase 4: Waste Line & Drain Stack Endoscopy
Digital micro-endoscopes inspect floor drain collars, shower trench outlets, and toilet pan connections to detect cracked PVC fittings, misaligned rubber rings, or loose wall penetrations.
Phase 5: Technical Report Generation & Repair Strategy
All diagnostic data, thermal scans, moisture grids, and pressure logs are compiled into a formal Technical Diagnostic Audit Report. The report pinpoints leak locations and outlines targeted repair strategies.
The 7-Layer Subfloor Elastomeric Waterproofing Remediation Standard
When inspection audits confirm extensive subfloor saturation and membrane failure, full civil remediation follows a 7-layer elastomeric polymer waterproofing protocol:
- Layer 1 – Concrete Base Slab Preparation: The bare RCC concrete slab is scarified clean of old mortar residue, micro-cracks are injected with polymer grout, and 2×2 inch polymer mortar coves are formed along all floor-to-wall junctions.
- Layer 2 – First Elastomeric Polymer Coat: A thick slurry coat of polymer-modified cementitious membrane is applied across the prepared concrete slab.
- Layer 3 – Fiberglass Mesh Reinforcement: Alkali-resistant glass fiber mesh (145 GSM) is embedded into the wet first coat along wall-floor perimeters and around drain collars to handle structural movement.
- Layer 4 – Second Elastomeric Sealing Coat: A cross-directional second coat is applied, extending 7 feet up shower walls to seal against moisture ingress through tile grout joints.
- Layer 5 – Sloped Screed Base: Screed concrete mixed with liquid waterproofing compound is laid at a precise 1:100 fall gradient toward point or linear trench drains.
- Layer 6 – Polymer-Modified Tile Adhesive: High-flex Type-2 or Type-3 polymer tile adhesive is applied with notched trowels, ensuring 100% full-bed coverage under tiles.
- Layer 7 – Anti-Skid Tile Surface & Epoxy Grout: R10/R11 anti-skid vitrified tiles or porcelain slabs are set and sealed with non-porous two-part resin epoxy grout.
Mandatory 72-Hour Standing Water Pond Test
Before laying surface tiles, the waterproofed floor basin is flooded with 6 inches of standing water for 72 continuous hours. Site engineers verify zero drop in water level and confirm lower-floor ceilings remain dry before certifying the slab.
Targeted Non-Destructive Repair Options
If inspection audits reveal localized leaks with dry subfloor slabs, non-destructive repair methods can restore waterproof integrity without removing tiles:
1. Two-Part Resin Epoxy Tile Regrouting
Old, cracked cement grout is raked out using dust-extracted mechanical tools. Joints are cleaned, dried, and injected with 100% non-porous, chemical-resistant two-part resin epoxy grout to create an impermeable surface barrier.
2. Hydrophobic Polyurethane (PU) Chemical Injection
For micro-cracks inside concrete slabs, technicians drill small injection ports along thermal anomaly paths. Liquid polyurethane resin is injected under high pressure. The resin reacts with moisture, expanding into a dense closed-cell foam that seals concrete voids internally.
3. Perimeter Silicone Joint Resealing
Sanitary-grade, anti-fungal silicone sealant is applied along all 90-degree tile junctions, vanity edges, and glass enclosure perimeters to accommodate structural movement and prevent water ingress.
Inspection Cost Breakdown in Hyderabad (2026 Price Index)
Below is an itemized cost spectrum for professional bathroom waterproofing inspection services across Hyderabad:
A. Inspection Service Fee Spectrum
| Diagnostic Package Tier | Price Range (Per Audit) | Included Inspection Scope & Deliverables |
| Standard Apartment Audit | ₹2,500 – ₹4,500 | Single bathroom inspection: FLIR thermal imaging, pinless moisture meter mapping, hydrostatic pressure test, visual grout audit, and digital PDF report within 24 hours. |
| Multi-Bathroom Flat Audit | ₹5,500 – ₹8,500 | 2 to 3 bathrooms in an apartment: Full thermal scanning, subfloor moisture mapping, pipe acoustic testing, endoscope drain audit, lower-floor ceiling inspection, and full technical report. |
| Luxury Villa & Master Suite Audit | ₹9,000 – ₹15,000+ | Full residence audit (4+ bathrooms, steam rooms, terraces): High-resolution FLIR thermal imaging, 3D moisture mapping, supply/drain line pressure testing, and RWA-compliant technical audit report. |
B. Sample Line-Item Cost Estimate for Non-Destructive Remediation (Single Bathroom)
| Remediation Scope Item | Estimated Investment Range (₹) |
| Non-Destructive Thermal Imaging & Diagnostic Inspection Fee | ₹2,500 – ₹4,500 |
| Raking Out Deteriorated Cement Tile Grout Joints | ₹2,500 – ₹4,500 |
| Ingesting Deep-Penetrating Crystalline Waterproofing Wash | ₹3,000 – ₹5,500 |
| Application of Two-Part Stain-Proof Epoxy Grout (Wall & Floor) | ₹4,500 – ₹8,500 |
| High-Pressure Polyurethane (PU) Chemical Grout Injection (if required) | ₹6,000 – ₹12,000 |
| Anti-Fungal Sanitary Silicone Sealing Along Perimeters & Glass | ₹1,500 – ₹3,000 |
| Total Non-Destructive Remediation Cost | ₹20,000 – ₹38,500 + GST |
Frequently Asked Questions (15 FAQs)
Q1: How much does a bathroom waterproofing inspection cost in Hyderabad?
Answer: A professional non-destructive bathroom waterproofing inspection in Hyderabad costs between ₹2,500 to ₹4,500 for a standard apartment bathroom. This includes FLIR infrared thermal scanning, pinless moisture meter mapping, acoustic pipe testing, and a detailed diagnostic report. For full villas or multi-bathroom audits in places like Jubilee Hills or Financial District, package pricing ranges from ₹6,500 to ₹12,000.
Q2: What non-destructive technologies are used to inspect bathroom leaks?
Answer: Inspectors utilize FLIR thermal imaging cameras to locate hidden temperature differentials from moisture, RF pinless surface moisture meters to measure subfloor saturation, ultrasonic acoustic leak detectors to pinpoint pinhole pipe leaks, and digital pipe inspection endoscopes to inspect internal drain lines without breaking tiles.
Q3: Why is ceiling paint peeling in the room directly below my bathroom?
Answer: Ceiling paint peeling or damp patches in the lower apartment indicate subfloor seepage. Water penetrates failed tile grout lines, bypasses worn-out waterproofing membranes, and accumulates inside the sunken slab concrete before seeping through micro-cracks in the lower floor’s slab.
Q4: How do inspectors distinguish between plumbing leaks and waterproofing membrane failures?
Answer: Plumbing supply leaks cause continuous, high-volume dampness regardless of fixture use, confirmed via hydrostatic pressure drop tests on CPVC/PEX lines. Waterproofing failures show intermittent dampness that spikes after showering, confirmed by thermal moisture mapping and localized flood testing.
Q5: How long does a thorough bathroom waterproofing inspection take?
Answer: A complete non-destructive inspection takes between 60 to 90 minutes per bathroom on-site. The digital diagnostic report, complete with thermal images, moisture heatmaps, and step-by-step remediation recommendations, is delivered within 24 hours.
Q6: Can thermal imaging see through thick vitrified bathroom tiles?
Answer: Yes. FLIR infrared thermal cameras detect minute surface temperature variations caused by moisture evaporation behind tiles and inside concrete slabs. Damp areas cool faster than dry areas, creating distinct thermal signatures on the scanner screen.
Q7: How does borewell hard water affect bathroom waterproofing in Hyderabad?
Answer: Hyderabad borewell groundwater has high mineral content (TDS). Hard water minerals form salt crystals inside porous cement tile grout and mortar beds. As these salt crystals expand and contract, they break tile joints and micro-fracture waterproofing coatings.
Q8: Can a bathroom leak be fixed without breaking the tiles?
Answer: If the subfloor slab mortar is dry and leakage is restricted to minor joint wear, non-destructive repair using deep-penetrating two-part resin epoxy grouting and polyurethane chemical injection can seal the surface. However, if the subfloor is waterlogged, a full elastomeric overhaul is required.
Q9: What causes salt efflorescence (white powder) on walls adjacent to bathrooms?
Answer: Efflorescence occurs when water trapped under bathroom floor tiles travels horizontally into adjacent bedroom brick walls via capillary action. As the moisture evaporates off the wall surface, it leaves behind dissolved mineral salts that push paint off in chalky white patches.
Q10: How does high-rise water pressure affect bathroom plumbing in Gachibowli and Kondapur?
Answer: Modern high-rise towers use automated hydro-pneumatic booster pumps that deliver high water pressure. In older or poorly installed CPVC networks, pressure surges (water hammer) stress pipe joints, leading to pinhole leaks hidden inside walls.
Q11: What is a 72-hour pond test and when is it conducted?
Answer: A pond test involves plugging all drain outlets and flooding the bathroom floor basin with 6 inches of standing water for 72 continuous hours. It is conducted during new waterproofing installations or structural repairs to certify 100% leak-proof integrity.
Q12: Why do tile grout joints crumble and let water pass through?
Answer: Traditional white cement grout is porous and degrades when exposed to acidic bathroom cleaners, friction, and hard water. Replacing white cement with non-porous two-part resin epoxy grout stops water penetration permanently.
Q13: How do inspectors check hidden concealed toilet flush tanks for leaks?
Answer: Inspectors insert micro-video endoscopes into flush plate access panels to check internal valves, frame anchors, and flush pipe rubber seals for silent leaks that seep down behind wall tiles.
Q14: Who pays for ceiling leak repairs between upper and lower apartment owners in Hyderabad?
Answer: Under standard Resident Welfare Association (RWA) guidelines and civil engineering practices, the source of the leak originates in the upper apartment’s subfloor slab. Therefore, the upper homeowner is responsible for inspecting and repairing their bathroom floor.
Q15: What written reports do you receive after a professional waterproofing inspection?
Answer: You receive a formal Technical Diagnostic Audit Report detailing thermal anomaly images, pinless moisture meter percentage maps, pressure test results, exact leak source locations, structural risk assessments, and itemized repair recommendations.